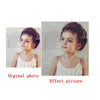
After days of commitment and dedication, your diamond painting is finally complete. Every square is filled in a way you want it to be and you couldn’t help admiring your own creation. It must have been very pleasing and satisfying moment for you. But, if you think that your job is complete here, you’re wrong. Despite the days of hard work and commitment, your artwork is yet to be refined further. And that’s when you get to the last step of diamond painting process: Sealing or Laminating the Painting To Protect Your Masterpiece.
Why do you need to seal or laminate the diamond painting?
Well, the adhesive on your canvas starts to lose its strength and diamond beads may fall off the painting ruining the whole look. There are two ways you can prevent the beautiful beads from falling from your exceptional painting: Laminating or Sealing. While a lamination adds the protective layer to your diamond painting and keep the beads tight, a sealant can stiffen up your painting and give it some strength. Doing it makes it easier to mount the painting on a wall or store it without causing any damage to the painting.
In this article, we will talk about how you can protect your diamond art using these two ways:
Laminating the diamond painting

When you have finally completed your diamond painting, you can simply frame it and get it tightly laminated with the transparent lamination paper. This lamination paper will help diamonds to stick on the canvas even when the adhesive has a starter to wear off. Lamination can help you protect your diamond painting for years. But you have to make very sure that the dust doesn’t get in because it would be harder to clean a laminated diamond painting and it may make your painting dull with time. Also, if your lamination starts to loosen up with time, the beads may also start falling off. Therefore, use only high-quality lamination that can stand any temperature and make sure that it makes no entrance for the dust.
Sealing the diamond painting
Sealing is another way you can protect your diamond painting.

Here are some of the materials you will need to put the sealant properly on your diamond painting:
- Sealer glue or spray
- Roller
- Paintbrush
- Tweezers
- Piece of cloth
You can choose any type of sealant. We highly recommend the glue that remains clean and clear after drying off.
Follow the steps below to seal your painting:
- The very first step is to remove all the air bubbles between the diamonds. Just move the roller with gentle pressure on all the sections of your diamond painting. This will possibly remove all the air bubbles.
- Remove all the dust from the diamond painting using the paintbrush or a toothbrush. Use the cloth to clean the painting well.
- Refine the further details of your painting using the tweezers.
- Now put the sealant gently on the painting. Make sure you are not using too much of it because it may reduce the shine of your diamond painting. If you’re using glue, you can spread it well with the paintbrush and if you’re using a spray sealant, simply 2-3 bursts will do the purpose.
Each adhesive comes with life. So, you might need to repeat this process once in 2-3 years to make sure that your diamond painting stays as it is for years.
Checkout diamond painting supplies, diamond painting tools, and diamond art!
 |
Checkout our all time bestsellers in our handpicked collections for you |
 |
Checkout our Huge Animal collection, more than 600 different kits of owls, birds, horses, dogs, cats, wolves, turtles etc |
 |
3 Must have Diamond Painting Supplies for creating a masterpiece |
 |
Top 5 Things to know before you buy diamond art kits |


